
Tuesday, 31 January 2012

Update on Shelving
Here is the final model of the shelving supports. I think they look realy nice and should add to the scene nicely.

Below is just a quick image of a quickly made shelf which I have shaped to be different and fit in with the rest of the scene, more than a boring rectangle shaped shelf. Below is just and image of these put together.

Monday, 30 January 2012
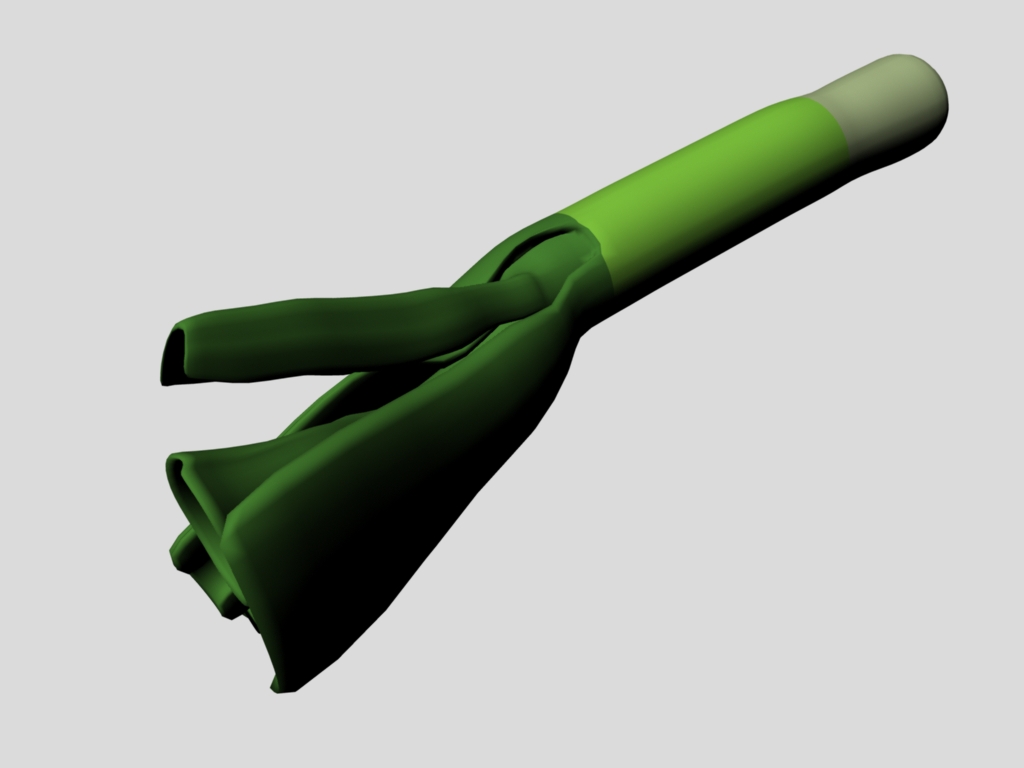
Creating the shelf supports
First of all I started to make them by polygon modelling, but it became apparent that CV curvs sould sped up the production time.
Below I have showed examples of how I created parts of the shelf supports


kitchen modelling
I have begun building a very basic kitchen so in the future I can begin to animate and place kitchen items/models into it.

Sunday, 29 January 2012
Updated fridge
After recreating the oven, I decided to go back to the fridge and shape it a bit more to help it feel more stylised. Al I have done is curved the shape and made it seem a bit more dented and distorted.

Saturday, 28 January 2012
Chefs hat progression
I have recently been playing around with creating the hat for Roy. I found it very tricky to actualy create a nice shape for the hat. I have made various attampts at the hat and the following are two varieties of hat, one very basic, the other trying to get the traditional shape of hat.
We will definately be going for the shaped hat, and I'm happy i finaly made one I'm happy with as it was a nightmare making this hat.

Friday, 27 January 2012
Monster oven
Recently Neil saw my oven, and thought it was too realistic, and not realy stylised in any way. He suggested trying to design it to resemble a monster itself. So after days of modelling this is what I have come up with:
- I have kept the hob tops/protecters on the top
- Sharank and shaped the oven body, shaping it to not be perfect.
- Added features to the front.
- Added a long tail like extracter pipe on the back of the oven.
- To complete the monster look I have used Roy's feet and added them and feet for the cooker.

Tuesday, 24 January 2012
Arga finnished
After loads of time modelling this oven, I think it is looking pretty complete, and ready to be put into the scene. I like how it has turned out and am happy wth it.

Monday, 23 January 2012

Tuesday, 17 January 2012

Monday, 16 January 2012

Thursday, 12 January 2012
Plasticine Model of Roy
I just decided maybe a nice way to get used to the anatomy of the character was to just physically build him from plasticine, with my own hands. Although Josh is the character modeller, I thought it would just allow me to personally view him in my own way and look/ imagine what I can do with him in regards to animation. It is extremely rough, and not exactly Aardman but it does the job.

Friday, 30 December 2011
Animation planning Post 5 - My 4th animation segment
In this animation it is realy all about the comedy that comes across from the couple. Both the timing and the character's expressions/ emotions will be what makes this fial pay off work to perfection. I must get acoss the funny intitial moment of Roy rolling past, but alsowith great timing add the stomping run of the mum chasing after her husband.

Thursday, 29 December 2011
Animation planning Post 4 - My 3rd animation segment
In this section of animation it is imperative that I get across the couples struggle to release Roy. I need to get the hilarity, and sympathy across to the audience so that they can connect with the characters.

Wednesday, 28 December 2011
Animation planning Post 3 - My 2nd animation segment
This is my second anmation sction, In this one my key objective is to get across Roy's feelings/emotions as this is one of the key scetions of the film. I have t get the right emotions, across to the audience or the won't conect to Roy, and they then won't understand what's happening to him.

Tuesday, 27 December 2011
Animation planning Post 2 - My 1st animation segment
This is a table I have created for my first section of animation. I've created this to give mea strong idea of what I need to do in this section. Keeing to this will help me to keep as close to the animatics times as possibl and will help me to define the actions adn emotions of each character at al times.

Friday, 23 December 2011
Summery of my YMCA animation
Overall I am prety pleased with the animation prduced in this short clip. It wasonly designed to be a test peice of animation, but I am realy quite proud of a few parts within in. I am happy I did thi test as it has allowed me to fully prepare myself foranimating the character within our film.
I will definately create a short video like this for each of our characters as it realy seem tohelp both develop my skills and deveop my understanding of each characters rg. I think this actualy is an essential part of the process otherwise I may have come into problems further down the line that could not have been resolved in time.
I will definately create a short video like this for each of our characters as it realy seem tohelp both develop my skills and deveop my understanding of each characters rg. I think this actualy is an essential part of the process otherwise I may have come into problems further down the line that could not have been resolved in time.
YMCA animation post 4- Day 2-3 progress (the faciel animation/lip sync)
Update 1
My first piece of faciel animation started with me seeing if I could lip sync just the letters being mimed by the character. I haven't done any proper lip sync before so this was a good time to test it out, and see what I could do. I think it has turned out OK, you can tell he is singing along to the song so it cannot be that bad.
Update 3
The addition of eyebrow movement's, an eye lid animations to the rest of the dance:
Update 4
From watching through the animation it was quite apparent that I needed to add a few blink in here and there, and play around with the eyes to stop them being so wide all of the time.
My first piece of faciel animation started with me seeing if I could lip sync just the letters being mimed by the character. I haven't done any proper lip sync before so this was a good time to test it out, and see what I could do. I think it has turned out OK, you can tell he is singing along to the song so it cannot be that bad.
Update 2
After having completed the lip sync it was time to add the rest the facial animation to him for this part. This was really just a case of widening the eyes, and lifting his eyebrows when he had to pronounce the Y, and the A.
The addition of eyebrow movement's, an eye lid animations to the rest of the dance:
From watching through the animation it was quite apparent that I needed to add a few blink in here and there, and play around with the eyes to stop them being so wide all of the time.
After a few more general adjustments, It's now all completed.
Thursday, 22 December 2011
YMCA animation post 3- Day 2 progress part 1 (finnishing the body mechanics)
Update 1
I have completed the rest of the characters spin, so that he comes back around to his full 360 degree turn. This part was one of the trickiesst I found, it was realy hard to get the feet into the correct postitions and corrct animation paths, as allot of the time atleas ton ef his feet would slide, or his leg would over stretch etc, tese problemsoccured for quit a while, but I evantualy got it to look ok.
I have completed the rest of the characters spin, so that he comes back around to his full 360 degree turn. This part was one of the trickiesst I found, it was realy hard to get the feet into the correct postitions and corrct animation paths, as allot of the time atleas ton ef his feet would slide, or his leg would over stretch etc, tese problemsoccured for quit a while, but I evantualy got it to look ok.
Update 2
All I have done is just have him standing there slapping his tummy to te beat, to end the dance and calmit down as the music faces out. I realy do like the overlap that I added to the fingers, and wrists as he slaps his tummy, I think it makes it look more realistick, an it adds more power to the slap of the beat.
Update 3
Here is just the final video of how the whole body animation looks without any emotion/ faciel actions, just before finnishing this I have done a few touch ups here ad tere to smoothen thngs out, adding and altering overlapping on hands, ad the body etc:
YMCA animation post 2- Day 1 progress
Update 1
In this update I have as you can see added a builders hat, I thought it was a nice little touch to bring to the animation. In regards to the animation itself I have done the following:
1)First of all added a lot more overlap/ drag to the movements of the body and head so that it flows better.
2) Set the YMCA letter spelling to both times it is sung.
3) In between I have added a little simple dance, just for a transition.
Update 2
Now that I had the YMCA part done it was time to focus on other sections. As I had 30 odd seconds to do I had to think up ways to transition into different dance moves. This first one is just a fun move I though up, it's a fun cheeky little move that suits the character. The pointing and wiggle of the character (what I thought up) built up nicely to the thrust of the hips.
Update 3
This is by far my favourite little bit of animation so far. I have now added a little jogging move that they do in the music video. I think it's a really fun and cute little move for the character.
Update 4
This is just a little piece of animation to add to the start of the dance. It is really just a warm up in a way, to build up the dance in sync with the adding in music. I wanted to keep it very basic so that as the song goes through the dancing will match the music and become more dynamic.
Update 5
Now it's where things are getting tricky. In the music video they clap along to the beat while doing certain moves. Due to the character have extremely short arms in proportion to his body he cannot clap his hands, so I have done an alternative of him slapping his little podgy belly instead. I had quite a lot of problems animating this bit, it was hard to match up to the beat and get the body parts to move at the right time. I believe that I got it pretty much there though.
Update 6
I have now added the next part to the end of the step clap dance. I have managed to get him to turn to face away like in the music video and ave also matched up the slapping of the tummy to match the beat. So all in all it has come out well this section.
Today's video so far:
Wednesday, 21 December 2011
YMCA reference video for dance moves
This is the original YMCA music video from 1978. I am going to try and animate my character dancing some of these moves, plus the more recent dance craze of people spelling the letters with there arms.
Idea for test YMCA animation with Jimmy rig.
I received the character rig off of Josh today and after a week of him asking for me to test his rig I finally tested this version he had made. I initially had a general fiddle around with the controlls to tell him if there were any issues, but then I felt like I would give it a proper test by having some fun with it. That is when I got the random idea in my head to make hi dance to the YMCA.
I originally just felt in he mood to do the chorus where people sign the letters with there arms. This however didn't really involve the whole body , so from there I have decided I will try and animate 30 seconds of dancing,trying to get a rage of moves to test out all of the parts of the characters rig.
I hope that I can produce a nice little test animation. It will be fun to do some animation at last as it is my chosen area, so I am rather happy about this, and extremely exited to get stuck in to it.
I originally just felt in he mood to do the chorus where people sign the letters with there arms. This however didn't really involve the whole body , so from there I have decided I will try and animate 30 seconds of dancing,trying to get a rage of moves to test out all of the parts of the characters rig.
I hope that I can produce a nice little test animation. It will be fun to do some animation at last as it is my chosen area, so I am rather happy about this, and extremely exited to get stuck in to it.
Tuesday, 13 December 2011
Animation planning Post 1 - The Divide
First of all me and Phil have decided between us a fair distribution of the animation. We decided the best way to do it was to split the film into short animation segments and then divide those segments between us.
On deciding who was animating what segments, we took into account a few different factors:
1) Having an equal total amount of animation in seconds.
2) Equal amount of scenes with different difficulty levels. (We wanted to make sure that we each had a few easy and a few challenging scenes otherwise it would be unfair).
3) Equal amount of action to acting scenes. ( Making sure we both had a few scenes of each
4) One of our key points to decide also was "What we want to show from the film"/ what skills d we individually want to display from his project".
From this we came up with the following split, which we felt gave us a pretty even divide:
Phil- 5-14 9 seconds chopping etc- just before mum enters
Aaron-14-25 11 secs Mum entering- mum leaving
Phil's bit 2- 25- 37 12 secs reaching for tap- when Roy hits his head on the sink
Aaron- 38-49 secs = 11 secs reaching and knocking over saucepan- just before mum switches light switch.
Phil - 49- 1:06 17 secs Mum switching light switch- end of granny part.
Aaron- 1:06-1:24 18 secs Mum wrestling to get Roy out of the insincorator- the black screen.
Black screen - 1:25- 1:29 4 secs
Phil- 1:30-1:44- 14 secs
Aaron- 1:45- 1:55- 10 secs
Phil= 52 secs, from black screen- when the ambulance leaves to the left to the screen.
Aaron= 50 secs, From when the ambulance leaves to the left to the screen
Perhaps add a little scene after credits where it shows the nans house with them laying there, perhaps nan tries to lift herself slowly with strain, but flops down again.
On deciding who was animating what segments, we took into account a few different factors:
1) Having an equal total amount of animation in seconds.
2) Equal amount of scenes with different difficulty levels. (We wanted to make sure that we each had a few easy and a few challenging scenes otherwise it would be unfair).
3) Equal amount of action to acting scenes. ( Making sure we both had a few scenes of each
4) One of our key points to decide also was "What we want to show from the film"/ what skills d we individually want to display from his project".
From this we came up with the following split, which we felt gave us a pretty even divide:
Phil- 5-14 9 seconds chopping etc- just before mum enters
Aaron-14-25 11 secs Mum entering- mum leaving
Phil's bit 2- 25- 37 12 secs reaching for tap- when Roy hits his head on the sink
Aaron- 38-49 secs = 11 secs reaching and knocking over saucepan- just before mum switches light switch.
Phil - 49- 1:06 17 secs Mum switching light switch- end of granny part.
Aaron- 1:06-1:24 18 secs Mum wrestling to get Roy out of the insincorator- the black screen.
Black screen - 1:25- 1:29 4 secs
Phil- 1:30-1:44- 14 secs
Aaron- 1:45- 1:55- 10 secs
Phil= 52 secs, from black screen- when the ambulance leaves to the left to the screen.
Aaron= 50 secs, From when the ambulance leaves to the left to the screen
Perhaps add a little scene after credits where it shows the nans house with them laying there, perhaps nan tries to lift herself slowly with strain, but flops down again.
Wednesday, 7 December 2011
End of term summery
This term has been very up and down for me in terms of the group project. It seemed a lot like we were just constantly changing our idea.
Overall I am prety disapointed with how much I personally have acheived so far in this project. I think though this was due to the amount of time me and Phil spent re- writing the story etc, so we realy didn't get much time to sebttle into the proper flow we wanted to in terms of production.
I personally would have liked to have modelled more than I have done up to this point. I seem to be into a good strong production flow at the moment in terms of modelling so I seem to be turning out completed modells prety quickly which is a plus.
As a team my analysis so far would be prety much how our blogs seem. There was a riduculous amount of time spent on story this term which realy knocked back our plans for production stage. I think every one of us was prety slack at the beginning, however I have seen a real boost in productivity in recently, and have seen some realy great work coming out of our team. I think everyone so far is playing there roles well and we are gelling and starting to catch up with our production shedual.
In conclusion I think concidering the constant idea changes we have done well to produce the amount of work we have at this stage, and am sure we can produce some beautiful looking work by the end of the year.
Overall I am prety disapointed with how much I personally have acheived so far in this project. I think though this was due to the amount of time me and Phil spent re- writing the story etc, so we realy didn't get much time to sebttle into the proper flow we wanted to in terms of production.
I personally would have liked to have modelled more than I have done up to this point. I seem to be into a good strong production flow at the moment in terms of modelling so I seem to be turning out completed modells prety quickly which is a plus.
As a team my analysis so far would be prety much how our blogs seem. There was a riduculous amount of time spent on story this term which realy knocked back our plans for production stage. I think every one of us was prety slack at the beginning, however I have seen a real boost in productivity in recently, and have seen some realy great work coming out of our team. I think everyone so far is playing there roles well and we are gelling and starting to catch up with our production shedual.
In conclusion I think concidering the constant idea changes we have done well to produce the amount of work we have at this stage, and am sure we can produce some beautiful looking work by the end of the year.

Tuesday, 6 December 2011

Monday, 5 December 2011

Aga phase 1
I wanted to move away from small assets such as fruit, veg nd utensels and concentrate on a bigger asset. As we haven't got much of a set yet I decided I would start to model a cooker.
From our kitchen's designs I thought an old aga would be a suitable style to include.
Below you can see the very first stages I have done. (main shape and two oven doors).

Saturday, 3 December 2011

Banana
During the week somebody gave the idea of adding a fruit bowl into the kitchen scene, so to start off I have made a banana.

Friday, 2 December 2011
Chopping board
It's basic at the moment with no colour. It has rubber circles on the bottom corners, as seen on many wooden chopping boards for softening the blow when putting it on down.


Wednesday, 30 November 2011

Tuesday, 29 November 2011

Monday, 28 November 2011
Modelling talk
Just a quick post to say my plans for this week.
Now that I am back to modelling, I hope to get lots done quickly as it feels like I haven't done as much work on this project as I would have liked. Josh has asked me to take over modelling the rest of the buildings for the street shot, so I plan to move onto those next week, and get through lots of small models for the kitchen.
Now that I am back to modelling, I hope to get lots done quickly as it feels like I haven't done as much work on this project as I would have liked. Josh has asked me to take over modelling the rest of the buildings for the street shot, so I plan to move onto those next week, and get through lots of small models for the kitchen.
Ideas dropped and changed
I'm realy annoyed today. Once again the idea has been changed, Phil went and saw Sean at the end of last week, and I have only just found out today that ideas have been dropped or changed. It is realy infurating me now, I just want a sebttled idea now and to realy get into the process of the story.
I'm just annoyed that we keep having ideas and then work hard on them for three weeks and they just get changed again. Everytime I keep feeling like were loosing all of our ideas and to me I think some of the comedy has been lost.
I understand the cuts of the first scene etc it just annoys me how many ideas we have gone through and none of them are good enough each time, so it feels like an endless circle.
Also having it changed again it has realy annoyed me as I realy tried hard last week on my animatic and put so much time into it. Now the idea has changed again I feel like I lost a whole week of work and waisted time I could have spent on more constructive work. I knew I wasn't good at drawing but hoped I'd get some considertation for that work but it feels like similarly to other ideas they've just been tossed in the bin.
I was very sorry to see the ideas of the child in the costumes get wiped out of the story. If I am honest I don't find the new story that funny anymore, to me too much of the comedy has been erased.
Hopefully when I get more into it, I may get the passion back for the idea, but at the moment it feels like i'm not realy working on a project I enjoy.
Hopefully getting back to modeling today will help me to get back into the flow and enjoyment towards the project.
I'm just annoyed that we keep having ideas and then work hard on them for three weeks and they just get changed again. Everytime I keep feeling like were loosing all of our ideas and to me I think some of the comedy has been lost.
I understand the cuts of the first scene etc it just annoys me how many ideas we have gone through and none of them are good enough each time, so it feels like an endless circle.
Also having it changed again it has realy annoyed me as I realy tried hard last week on my animatic and put so much time into it. Now the idea has changed again I feel like I lost a whole week of work and waisted time I could have spent on more constructive work. I knew I wasn't good at drawing but hoped I'd get some considertation for that work but it feels like similarly to other ideas they've just been tossed in the bin.
I was very sorry to see the ideas of the child in the costumes get wiped out of the story. If I am honest I don't find the new story that funny anymore, to me too much of the comedy has been erased.
Hopefully when I get more into it, I may get the passion back for the idea, but at the moment it feels like i'm not realy working on a project I enjoy.
Hopefully getting back to modeling today will help me to get back into the flow and enjoyment towards the project.
Thursday, 24 November 2011
My animatic- scene 2 part 1
This is my share of the 2nd sceneof the animatic. I managed to complete mine in time for the showing with Sean and Peter but unfortuntely Phil had soe problems, and we weren't able to put it all togeher in time to show. Hopefully we an ge it together for Monday and show Sean.
Tuesday, 22 November 2011
My animatic- scene 1 part
This is the first task of my on the animatic. I have spent 2 days on this, struggling to draw, but I hope it's clear enough to understand. This is my half of the first scene to draw up.
Monday, 21 November 2011
Animatic plans
Today me and phil have been discussing changes, and planning the animatic. We have gone through new ideas and put together all the shots in rough and have divided up the shots for each of the three scenes for us to try and get the animatic done for Thursday to show everyone.
I am extremely rusty at drawing, however I will try my best.
I am extremely rusty at drawing, however I will try my best.
Thursday, 17 November 2011
Newidea again and hopefully the last.
Today we yet again saw Sean to try get a story sorted and heading in the right direction. He leaned us more towards slapstick comedy, taking us away from so many static shots, talking and the formal approach of cutting to each character in each room etc.
Later in the day we managed to compile a story with using our last stories beginning but added a slapstick section after it. Josh came up with the idea this time which was nice to get fresh ideas from him as he doesn't like to get involved in the story usualy.
Anyway with a bit of discussion and some entertaining role play we got a pretty short and punchy idea together.
We scrapped one child and left ourselves with 2 children but have now somehow gained an interviewer and ambulence crew.
I will post up the idea in a moment in image form.
Later in the day we managed to compile a story with using our last stories beginning but added a slapstick section after it. Josh came up with the idea this time which was nice to get fresh ideas from him as he doesn't like to get involved in the story usualy.
Anyway with a bit of discussion and some entertaining role play we got a pretty short and punchy idea together.
We scrapped one child and left ourselves with 2 children but have now somehow gained an interviewer and ambulence crew.
I will post up the idea in a moment in image form.
Creating a teddy bear for the little girl monster
My production over the day of the teddy bear
I modelled it from a cube, extruding out the head, arm, and leg, and then I duplicated and copied over the good side and attached them together. The teddy bear still needs work, so hopefully I will get it looking nice soon.

Tuesday, 15 November 2011

Monday, 14 November 2011

Sunday, 13 November 2011

Saturday, 12 November 2011


Friday, 11 November 2011

Thursday, 10 November 2011


Subscribe to:
Posts (Atom)